How to test SMTP to SMS using telnet
Learn how to test SMTP to SMS using Telnet. This comprehensive guide will walk you through the process of enabling the SMTP service in Ozeki SMS Gateway, downloading PuTTY, connecting to the Ozeki SMS Gateway SMTP port, sending an email using Telnet, and checking the Ozeki SMS Gateway SMTP log.
1.) Enable the SMTP service in Ozeki SMS Gateway Advanced menu
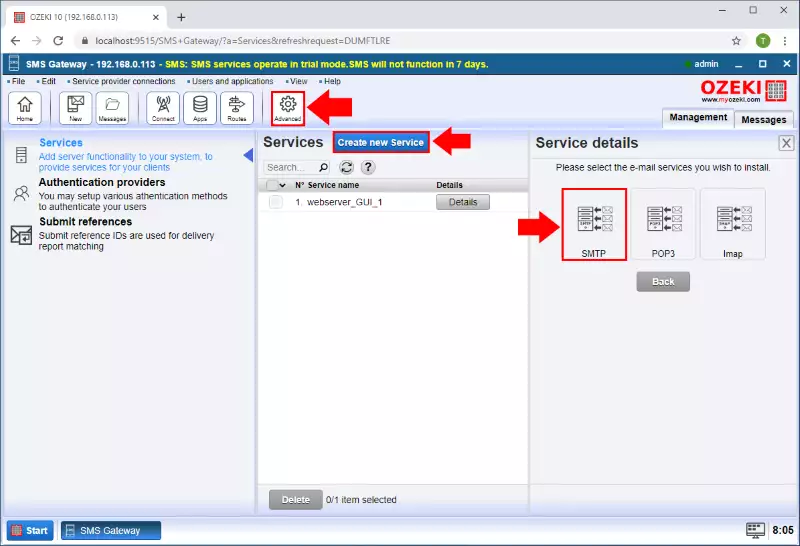
First, open the SMS Gateway application, and on the toolbar, click on the icon of the Advanced option. Here, as you can see it in Figure 1, just click on the Create new Service button. Next, you need to select the E-mail option from the list of available service types. After you selected the E-mail option, like Figure 1 demonstrates it, you need to click on the SMTP service type.
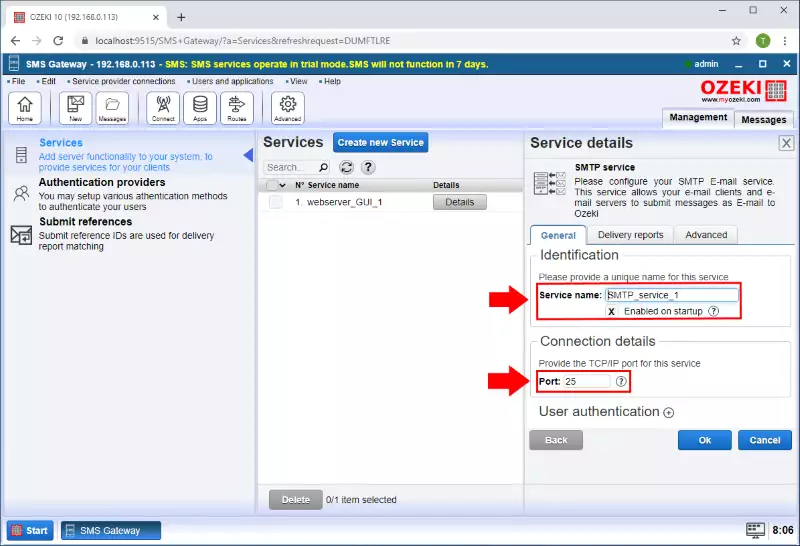
Next, in the configuration menu, you need to provide a name for the service. This name will be used by the SMS Gateway to identify the connection. The next thing, that you need to do here is to specify a port number for the SMTP service (Figure 2). This is 25 by default, and you can leave it there.
2.) Download putty
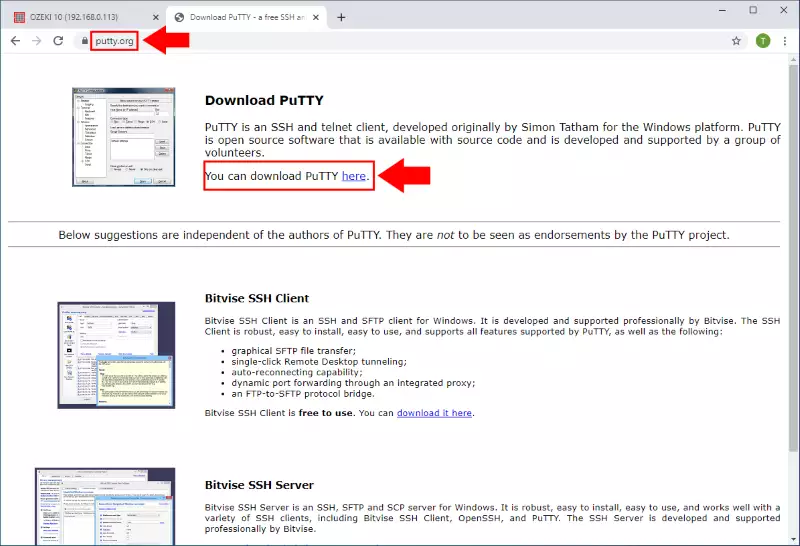
PuTTY is a free and open-source terminal emulator, serial console and Telnet application. It supports several network protocols, including SCP, SSH, Telnet, rlogin, and raw socket connection. In this example we will use this software for telnet to the Ozeki SMS Gateway SMTP port. You can download it from the putty.org (Figure 3).
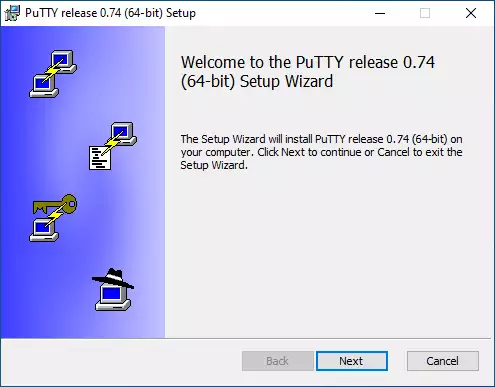
After the installer is downloaded install the software with it Setup Wizard (Figure 4).
3.) Telnet to port 25 of the Ozeki SMS Gateway PC
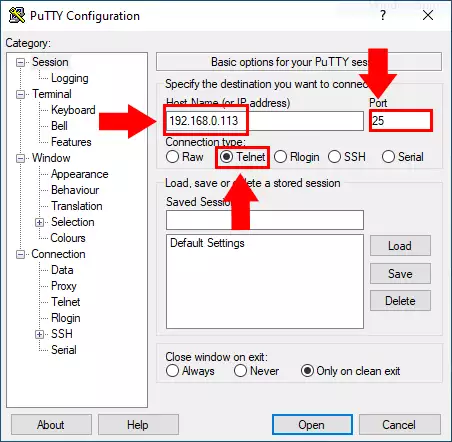
Next open the Putty and connect to the Ozeki SMS Gateway SMTP service. Select the Session menu from the categories then define the IP address and port of the Ozeki SMS Gateway SMTP service (Figure 5). The connection type will be Telnet. Finally click on the Open button.
4.) Send an e-mail using telnet
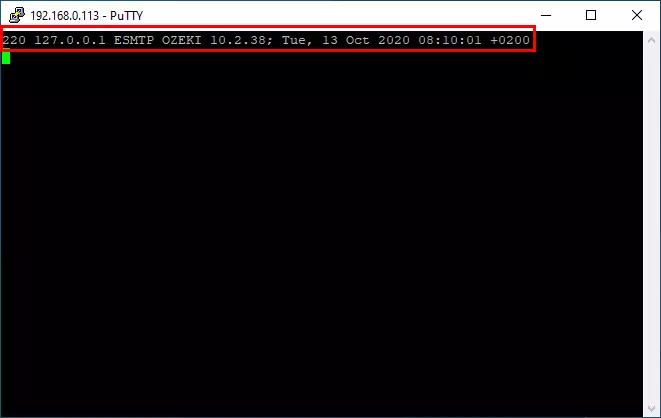
You can see in the new console that the connection to the Ozeki SMS Gateway SMTP service is established as the Figure 6 shows.
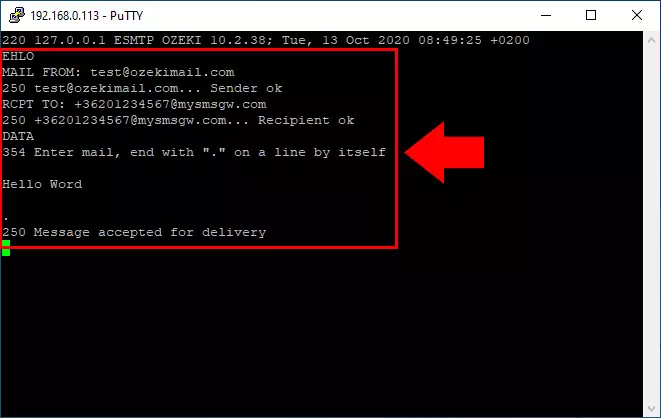
Finally, you can send an e-mail using telnet by typing the below commands as you can see in the Figure 7. If you use +36201234567@mysmsgw.com as the recipient e-mail address, the SMS will be sent to +36201234567.
EHLO
MAIL FROM: test@ozekimail.com
RCPT TO: +36201234567@mysmsgw.com
DATA

Hello world
.
5.) Ozeki SMS Gateway SMTP log
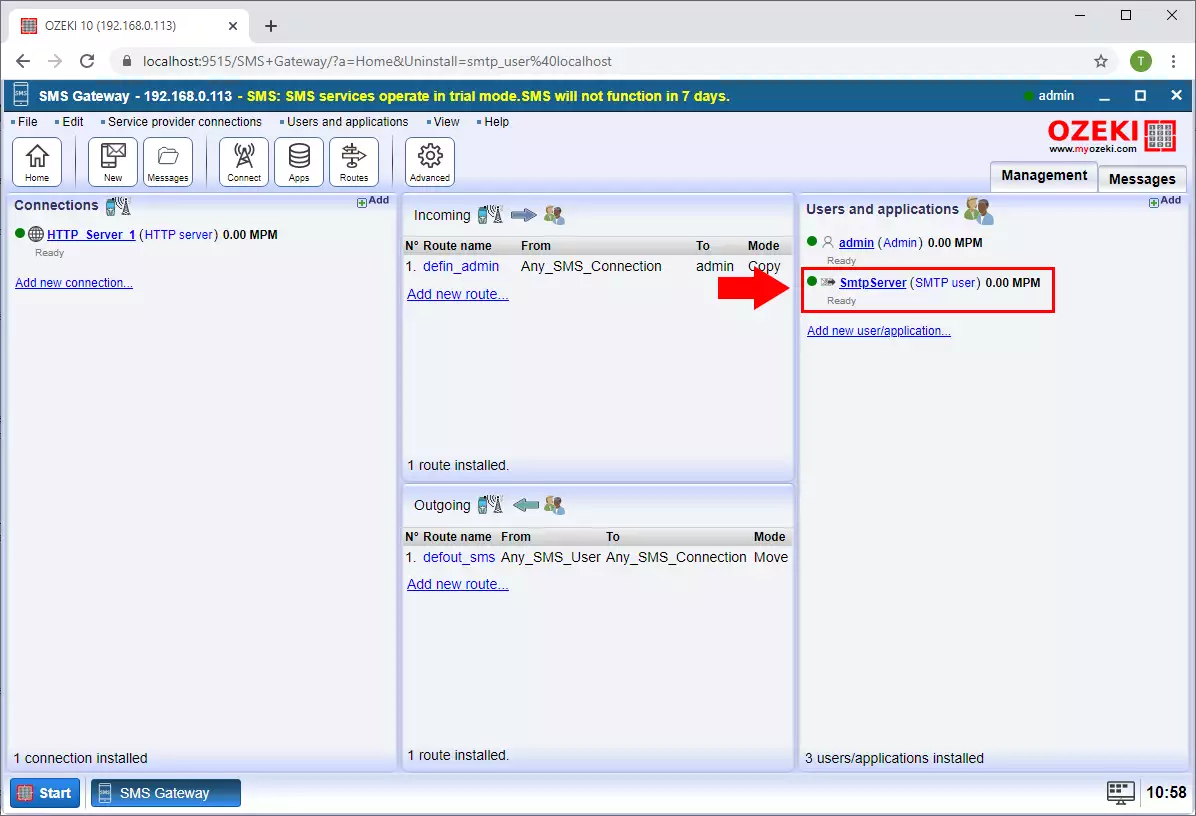
For check the Ozeki SMS Gateway SMTP server logs the first step is to open the SMTP server connection on the right side of the SMS Gateway Manager console page as you can see it on the Figure 8.
Now in the Log level section of the user's Advanced tab enable the 'Log communication events' and 'Log messaging events' checkboxes if you wish to add log information about routing decisions, message delivery events and the SMTP communication (Figure 9).
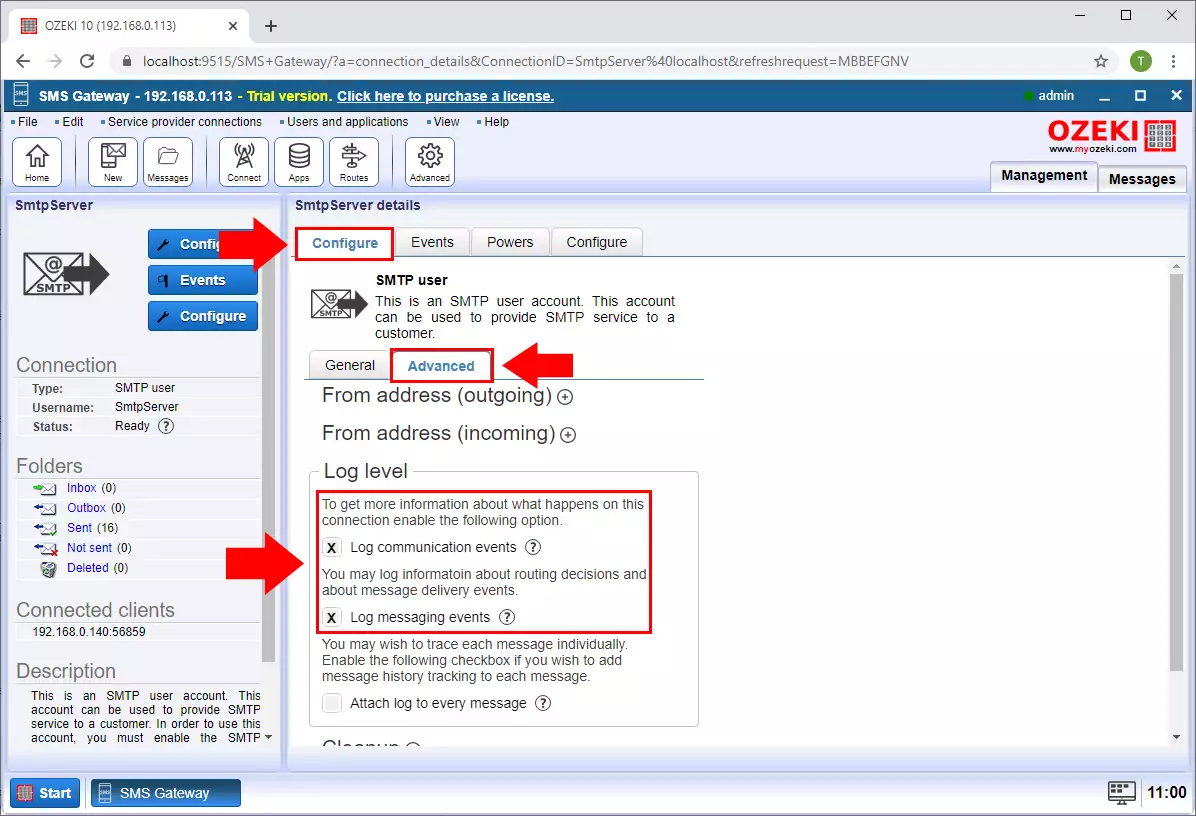
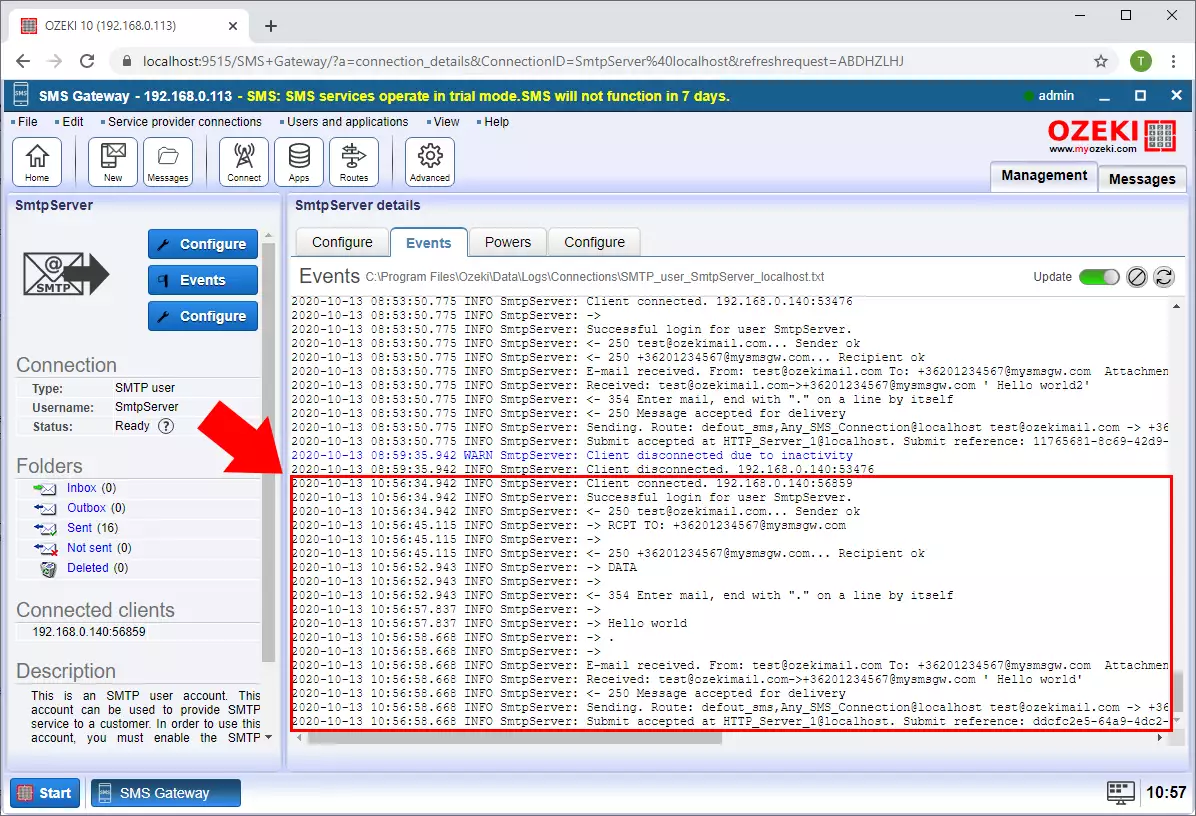
Once you have enabled the 'Log communication events' and 'Log messaging events' options, you will see information about routing decisions, about message delivery events and you will see the SMTP communication in the Events menu when you receive an SMS (Figure 10).
